Start Code::Blocks by double-clicking the workspace file you created.
Code::Blocks will open its front page. On that page, click Create a new project.
Chris Riesbeck
Last updated: July 9, 2010
Jump to Installing Cygwin, Installing UnitTest++, Installing Code::Blocks, Creating a project, Tips and traps, the Code::Blocks FAQ.
All you really need to build a C++ application is a compiler, a Makefile to document what needs to be compiled and how, and a text editor to edit the source code. But life is a lot easier with an integrated development environments (IDE). An IDE provides a convenient interface for editing, compiling, running, and debugging code. There are many IDEs. Most are quite similar to each other, and use similar terms, such as "project" (a collection of source code files that combine to make an application) and "workspace" (a collection of projects).
On Windows and/or Linux, I recommend Code::Blocks. Code::Blocks is a free integrated development environment (IDE) for C and C++ on Windows, Linux and MacOS X.
Code::Blocks is actually a graphical front-end to the C/C++ compiler. By default, it uses the Gnu C compiler (GCC). GCC comes with Linux and MacOS X. On Windows, GCC is available via MinGW or Cygwin. We'll use Cygwin in this class because Cygwin also provides a Unix-like shell and a nice installer.
By default, Code::Blocks uses its own internal project management system, but in this class, we are going to use Code::Blocks with custom makefiles. This takes a little bit of extra care when creating projects, but pays off in portability.
These instructions are for Windows. You need Windows XP or later. If you have Vista or later, you will need an account with administrative privileges.
Install Cygwin: Code::Blocks can use many C++ compilers. We use Cygwin here, because it support graphic applications on Windows. See these installation instructions for setting up Cygwin. Do this before installing Code::Blocks.
Fix compiler links: In Cygwin, the C compiler gcc.exe and C++ compiler g++.exe are actually just symlinks to the real programs. Unfortunately, while these work in a Cygwin command shell, they don't work in a Windows command shell nor in Code::Blocks. I recommend doing the following:
Set environment variables: Cygwin will give a warning message when Code::Blocks uses a Windows-style pathname like C:\Cygwin\bin\gcc. To turn this warning off:
Follow these instructions to install the UnitTest++ unit testing framework for C++.
Test: After installing Cygwin, test your setup.
Downloading and installing Code::Blocks takes just a few steps.
This is a good time to quit and save your workspace so far, even though there's nothing in it. When you exit Code::Blocks, it will ask where you want save the workspace file. Put it in the top level of your projects directory. Give it a short name, with no special characters or spaces. The file will be saved with the extension workspace. Later on, just double-click this file to start Code::Blocks.
A console project is a program that does all input and output through a console window, such as Window's Command Console or MacOS X's Terminal window. These are the simplest programs to write, but still useful, especially in the Unix world.
The easiest way to create a console project that uses the NU EECS Magic Makefile is to use the UnitTest User Template. Once you install this User Template into Code::Blocks, project creation is just a few steps. Alternatively, you can create a Code::Blocks project from scratch.
Install the UnitTest++ project template: To make it easier to create projects using UnitTest++, download UnitTestTemplate.zip. Extract the subdirectory it contains, UserTemplates, into the Code::Blocks application data directory:
Start Code::Blocks by double-clicking the workspace file you created.
Select the menu option File | New ... | From user template.... UnitTest++ should appear as an option. If not check, your installation.
Select UnitTest++ and click .
The project wizard will ask where to put the project. This is the only tricky part, at least on Windows. It's way too easy to end up with a useless folder called New Folder. Follow these instructions:
The wizard will now ask for a project name. Give exactly the same name as the folder, with the same capitalization. Click .
A new project should appear in your workspace. It will already contain the Magic Makefile and a tests.cpp file ready for test cases.
You're done! Test by doing Build | Build and Run. The project should compile and run without error. Nothing will happen of course since there are no tests yet.
Follow these instructions to create and test an example project using the Magic Makefile from scratch.
Start Code::Blocks by double-clicking the workspace file you created.
Code::Blocks will open its front page. On that page, click Create a new project.
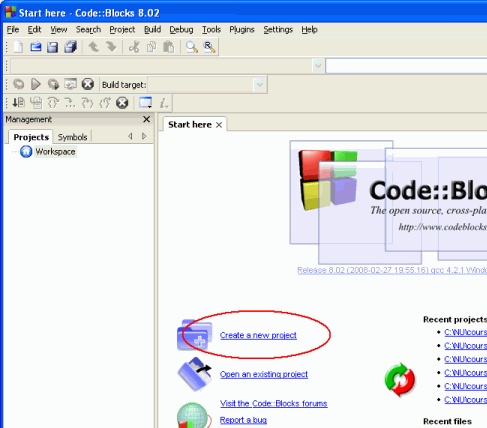
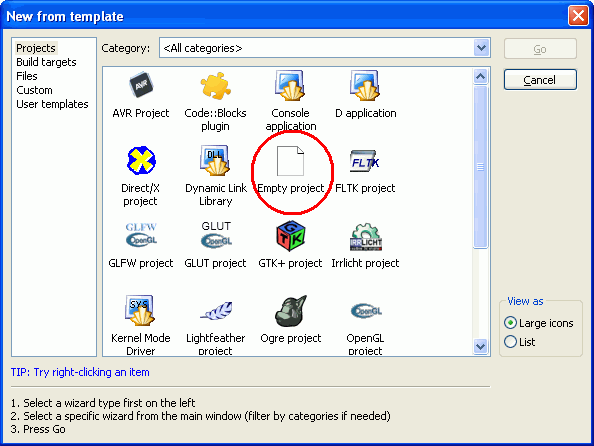
A dialog box will appear with options for many different kinds of projects.
Click on Empty project and click .
The project wizard will introduce itself. Click .
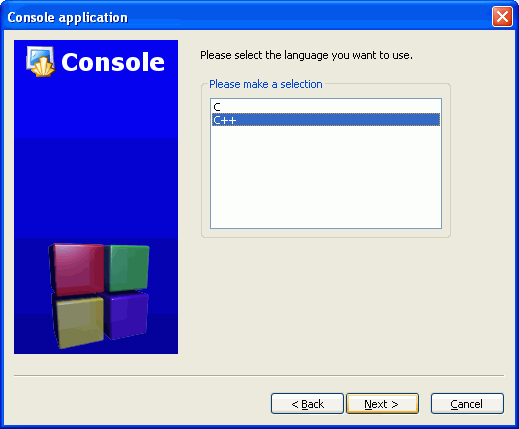
The wizard will ask which programming language you want to use. Pick C++ and click .
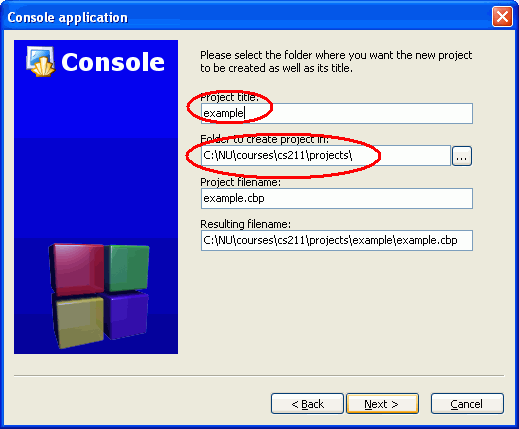
The wizard will ask what you want to call your project and where you want to put it.
Click and use the file dialog box that appears to find and select your course projects directory.
Then enter the project name. Avoid spaces and special characters. For the example project, therefore, use example.
Click when done.
Code::Blocks will ask what targets you want to build. Since you'll be using a Makefile with a target called all,
Click when done.
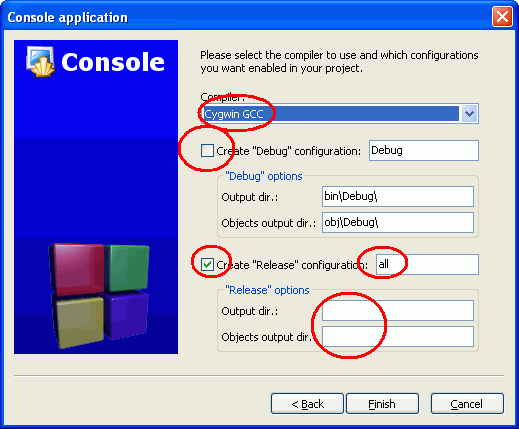
Now tell Code::Blocks which files are part of your project.
Select Add files... from the Project menu.
Select the Makefile and the .h and .cpp files in the example directory. Don't select the Code::Blocks files with extensions like .cbp and .layout.
Afterward, click on the plus-signs in the project window, to see the files grouped under Sources, Headers and Others.
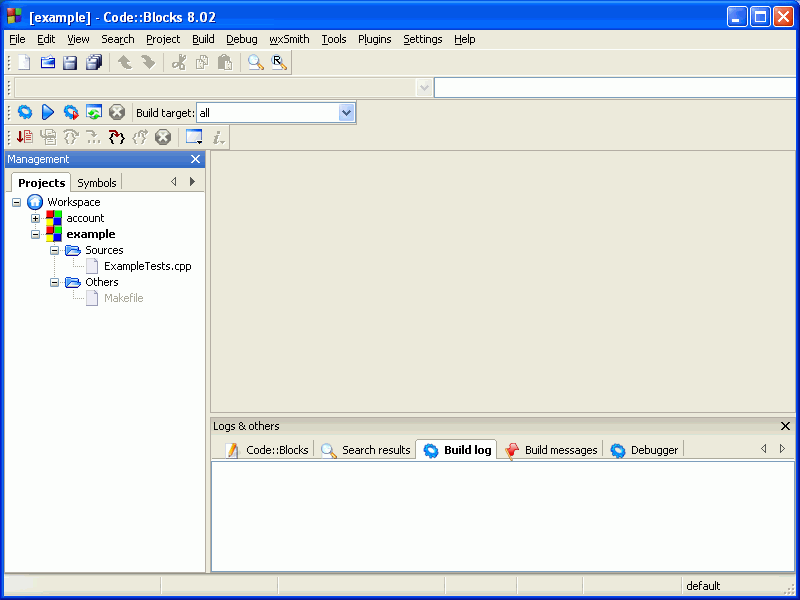
Now tell Code::Blocks how to call the Makefile
Select Properties... from the Project menu.
Check the box for This is a custom Makefile..
Click to save this setting.
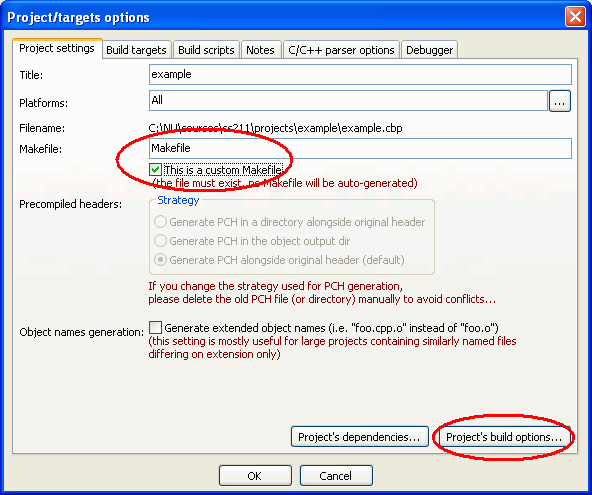
Select Build Options... from the Project menu.
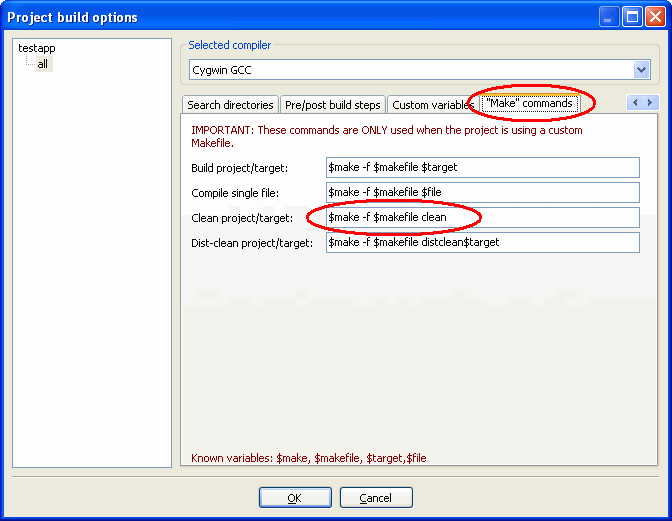
Use the arrow buttons to scroll the tabs until you see the "Make" commands.
Select "Make" commands and change the field for
Clean project/target to be $make -f $makefile clean.
Click twice.
Now test your project.
Select Build and Run from the Build menu.
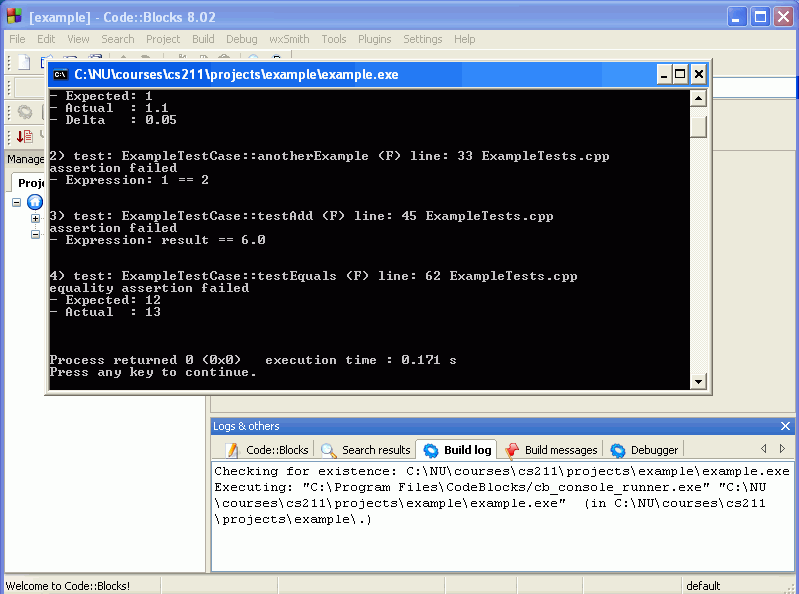
If all is set up correctly, the project should compile your project, creating the application example.exe. It then runs the application in a console window.
The console output should look like the output you saw when you ran the executable directly in a console window.
To close the console window and return to your project, press any key while the console window is active
Exit Code::Blocks to save your work.
Learn the shorcuts. This is a general tip for any development tool. After you've used your IDE a bit, learn to use the keyboard shortcuts for compiling and running and so on. This will speed up coding and testing a lot.
Don't rename code files in the Finder. This is a general tip for any development tool. Don't rename or delete files behind its back. The IDE can get very confused. Most IDEs provide their own commands for renaming and removing files, that rename or remove the file and also update the IDE's internal records.
Start Code::Blocks by double-clicking your workspace file. If you keep one workspace file with all your class projects, you'll have easy access to old code, and Code::Blocks will remember many (though not all) of your settings when you create a new project.
Comments?  Let me know!