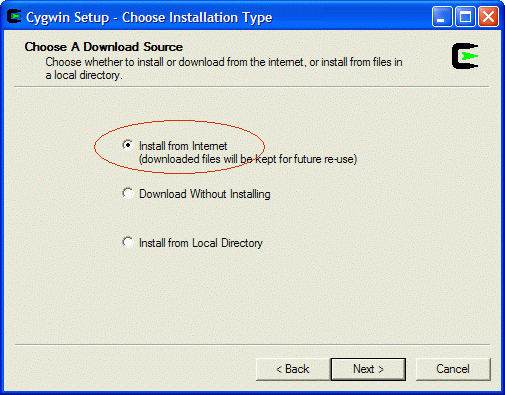
When the installer asks how you want to get the Cygwin files, select the first option. This will download the files you pick and then install them automatically.
Click Next >.
Chris Riesbeck
Last updated: July 3, 2009
My C and C++ course uses the gcc compiler and the Unix environment, both for consistency, and to expose you to the platform used by many practitioners in computer science. Unix / Linux and gcc are available on Linux, on MacOS X machines after installing the XCode Developer tools, and on Windows, after installing Cygwin. This page is about setting up Cygwin for Windows.
Cygwin is a Linux-like environment for Windows. It can be downloaded for free from http://www.cygwin.com. This is the environment that will be used to demonstrate things in class.
If you have Cygwin, but with GCC version 3, see these instructions for how to switch.
You need Windows XP or Vista. Cygwin comes with an installer that lets you get just the Unix tools you need (there are 100's). For typical courses, you only need the Gnu C++ compiler and some standard utilities, requiring about 200 megabytes of disk space.
Cygwin is fairly simple to install. You first download a small installer program. Then you run this installer to download the Cygwin packages you need. The installer takes care of downloading and installing not only the files you ask for, but any files those files require.
The instructions below should get you going. If you'd like more information, see the Cygwin setup notes.
When the installer asks how you want to get the Cygwin files, select the first option. This will download the files you pick and then install them automatically.
Click Next >.
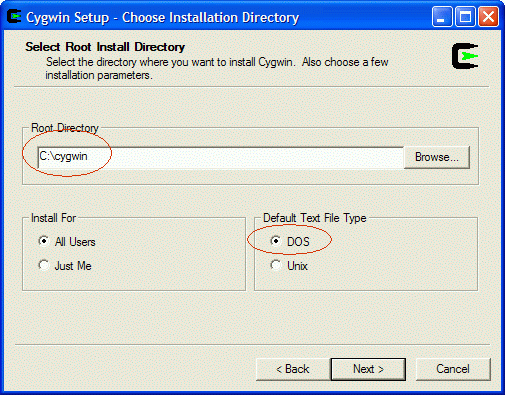
When the installer asks where you want to put the Cygwin files on your machine, you can use the default c:\cygwin, or any other place where you have a reasonable amount of space.
VISTA USERS: Check the Just Me option, not All Users.
Click Next >.
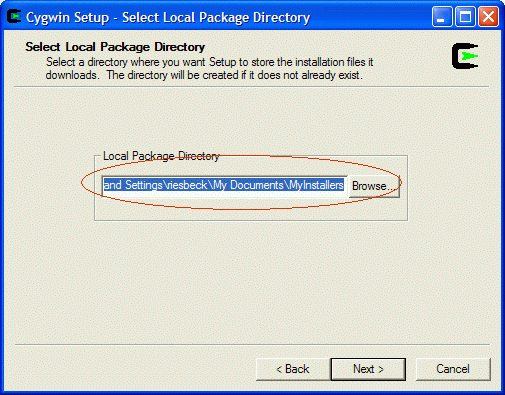
When the installer asks where you want to put Cygwin's temporary files, you can use the default, which will be a directory in your user document and settings directory. These files can be deleted later if you need the space.
Click Next >.
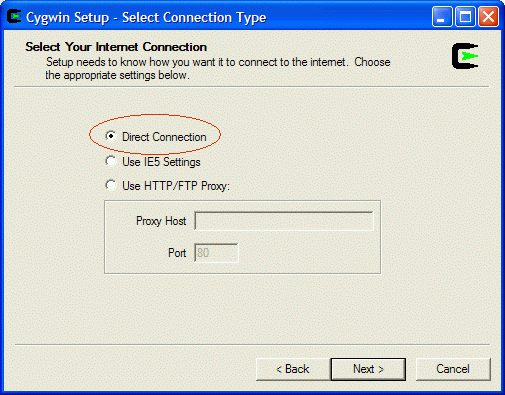
When the installer asks what kind of connection you want, just use the default first option.
Click Next >.
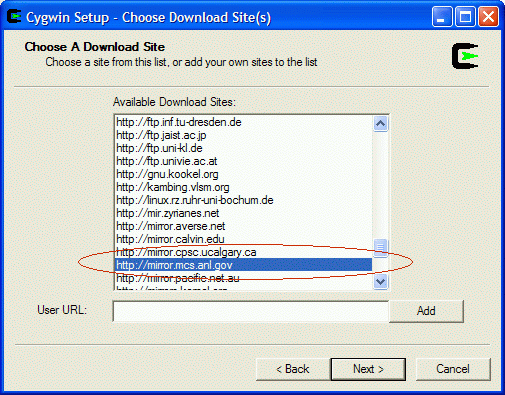
When the installer asks which site to download from, pick a location near you. I chose Argonne National Laboratory.
Click Next >.
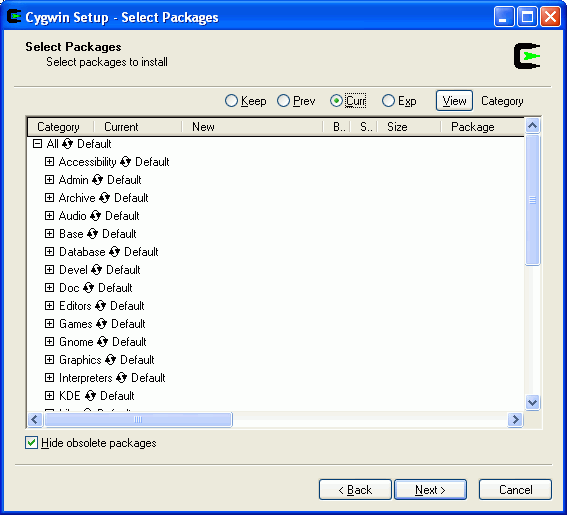
Now the installer shows you the various software packages you can download. Because there are so many, they're organized into groups, like directories in a file system. The Archive group has the zip software packages, and the Devel has many developer software packages.
To see things better, first enlarge the dialog box to full screen.
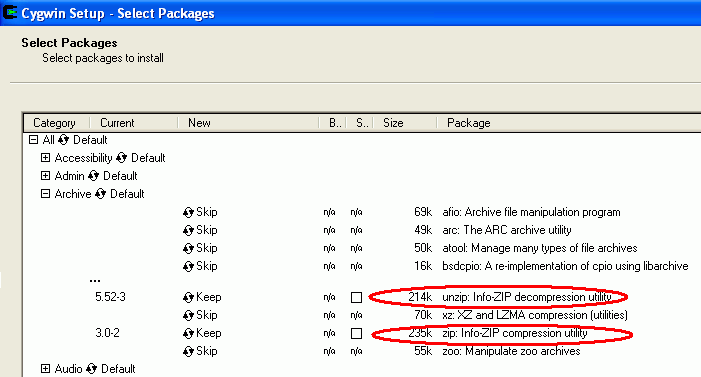
Click on the plus (+) sign to the left of Archive to open that group,
look for zip and unzip. If either one currently
says Skip, click it once to tell the installer to download it.
The installer will automatically select any other required auxiliary packages -- some packages require dozens of other packages.
Warning: Auxiliary packages are not automatically unchecked if you click again to select a different version or to go back to Skip. If you click on the wrong package I recommend clicking the < Back button to return to the previous dialog, then Next > to start over.
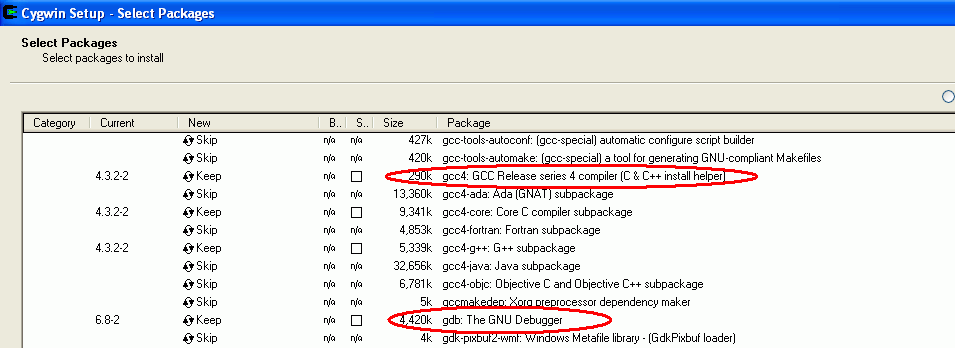
Click on the plus (+) sign to the left of Devel
to open that group, scroll down and select gcc4 and gdb,
if they currently say Skip. Do not select gcc -- that's the older
GCC version 3.
If you already have GCC version 3, get GCC version 4 and see these instructions for how to switch.
Scroll down further and select make.
Click Next >.

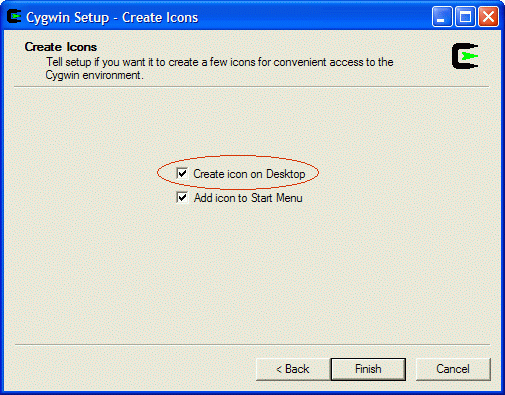
The Cygwin installer will now download the requested packages and install them. When it's done, it will ask you if you want to create a desktop icon for the Cygwin command shell, and an entry in the Windows Start menu. I recommend that you at least take the desktop icon.
To start the Cygwin shell, just double-click the desktop icon. This will open a command window, similar to Microsoft's DOS shell, but instead of DOS commands, you have Unix, including the Gnu C++ compiler.
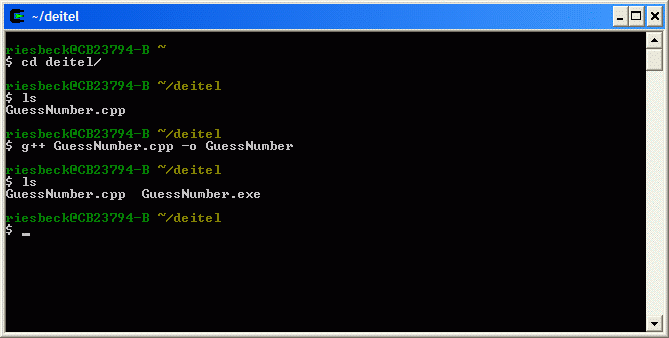
Unix, and therefore Cygwin, starts you off in your "home" directory when you open the shell window. Cygwin by default will create a home directory for you inside the Cygwin directory, which can be a problem if you need to reinstall Cygwin later. Therefore, it's better to define a home directory in a safer place, such as your EECS 211 projects directory.
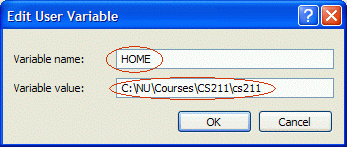
You do this by defining a Windows environment variable called HOME.
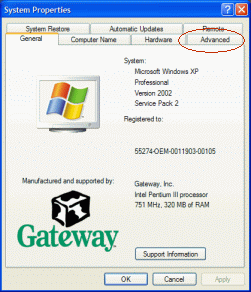
Right-click on your My Computer icon and select Properties from the menu. The System Properties dialog box will appear. Click on the Advanced tab.
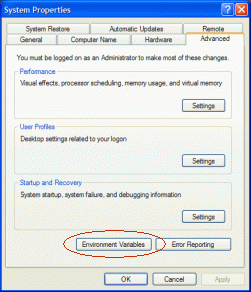
Click on Environment Variables.
Click New under User variables.
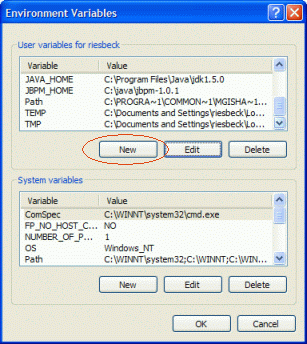
Type HOME into the Variable name field and whatever directory you are using for EECS 211 code into the Variable value field.
Click OK to save your changes.
Now when you open a Cygwin window, it will put you in the directory you specified in HOME.
Here's what to do if you already have GCC 3 installed on your computer:
gcc --version. If it says GCC 4.x for some
x, you're done./usr/sbin/alternatives --config gcc.
Note the double-dashes.gcc --version. If it says GCC 4.x, you're done.
Comments?  Let me know!