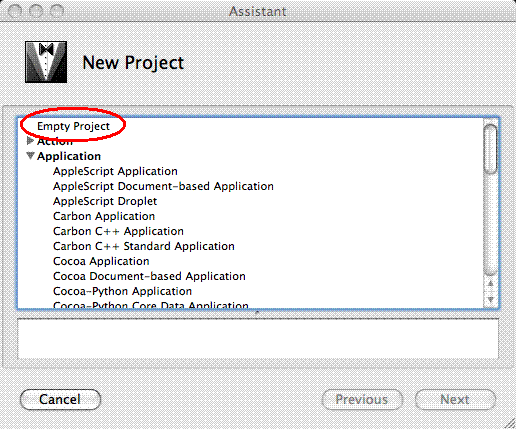
Start Xcode, click on the File menu, then on New Project.... The New Project dialog box will appear.
Select Empty Project, then click Next.
Chris Riesbeck
Last updated: July 2, 2009
Xcode is a free integrated development environment (IDE) for C, C++, Java and other languages on MacOS X. It comes on the CD distributed with the Leopard edition of MacOS X.
Even if you are not planning to use XCode, you need to install it to get the Unix tools, such as gcc and make.
Jump to Installing, Creating a project, Tips and traps.
You need to have XCode installed. It's best to have the current version. If you have Leopard, install XCode from the CD distributed with your machine. If you have an older version of MacOS X, or don't have your installer disk, see these instructions for downloading Xcode from Apple. This chapter has useful tips on what you can leave out.
After installing XCode, get UnitTest++.
After getting UnitTest++, test your setup.
Even though it's easy to use the NU EECS Magic Makefile to compile your code in a Terminal window, I still recommend using XCode as a graphical user interface to edit, compile, test, and debug your projects. It's much faster and easier to do these things in an IDE, because the IDE can check your syntax automatically, jump directly to lines with errors in them, and do other menial tasks for you.
The instructions below show how to build an XCode console C++ project, using a Makefile. A console project is one that does all its input and output in a console window, e.g., a terminal window. Such programs are a bit old-fashioned but simple to set up and just fine for unit testing.
Start Xcode, click on the File menu, then on New Project.... The New Project dialog box will appear.
Select Empty Project, then click Next.
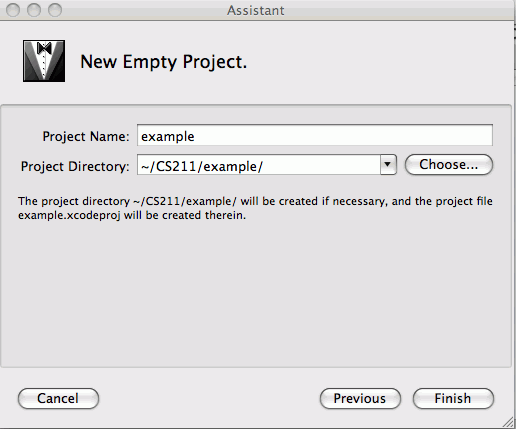
Xcode now asks for a project name and a directory. Click on to get a file dialog box. Use it to find and select your course projects directory.
Then enter the name of the project, e.g, example. Xcode automatically uses the project name to make a subdirectory.
When done, click Finish.
The New Project window will appear.
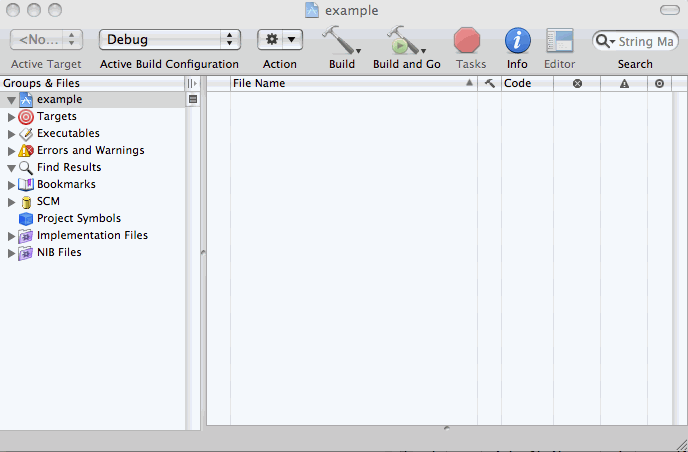
Select Add to Project... from the Project menu.
Use the mini-Finder window to find and select the two source files in the
example directory. Use command-click to select all four files
at once. (You don't actually need to select
Makefile or header files, if there were any,
but it's handy to have them available in the editor.) Click
to add the selected files.
Your project window should now look like this.
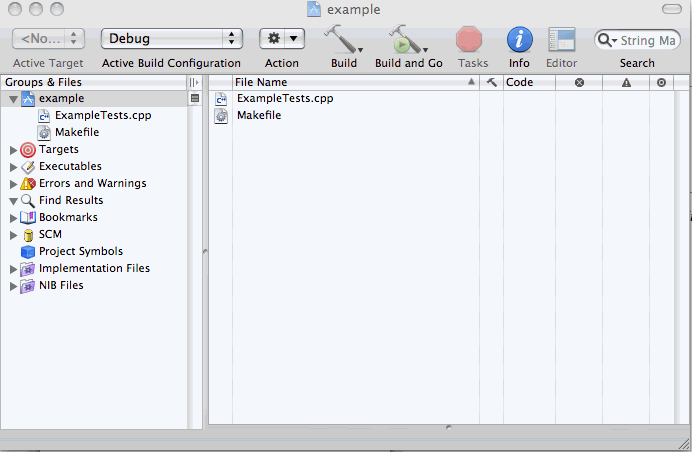
Now tell XCode to use the Makefile.
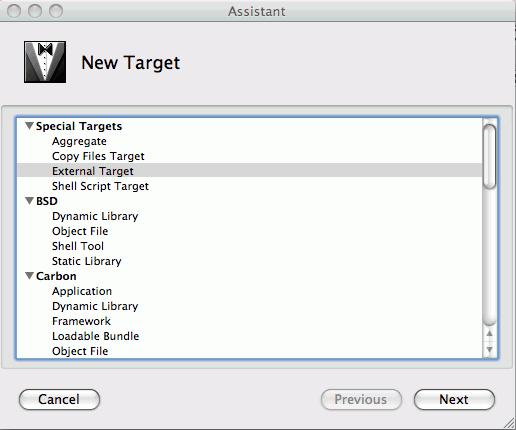
Select New Target... from the Project menu. Select External Target under Special Targets. Then click Next.
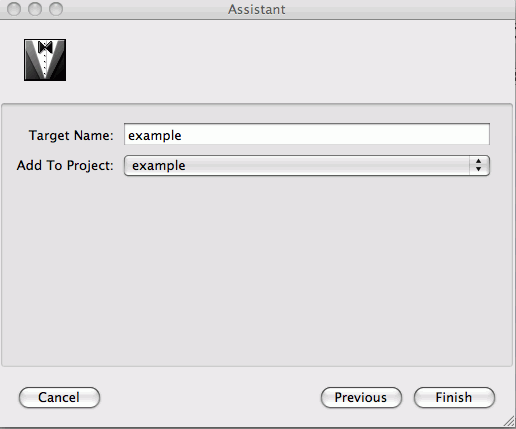
Xcode will ask you to name your target. Just call it example
and click Finish.
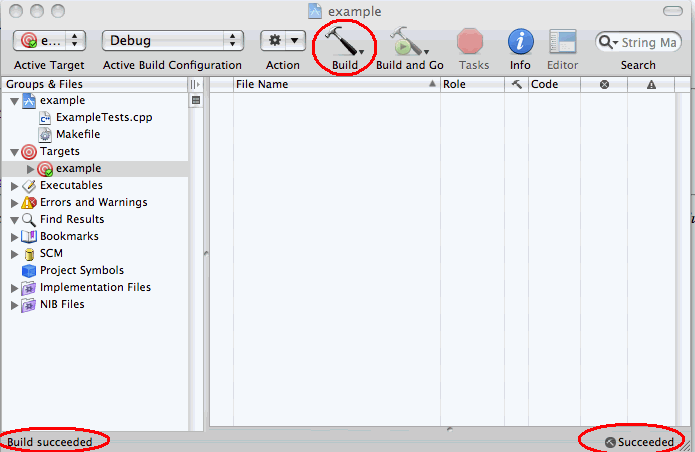
Now you're back to the project window. Click the Build button. You should see "Build succeeded" and "Succeded" in the status lines at the bottom of the window. If not, click the small error icon to the left of "Failed" in the lower-right corner to see the error messages. Try to fix them. Post the first one or two to the course newsgroup if you can't figure out what to do.
When you have an executable file, you can tell XCode to run it when you click the Build and Go icon.
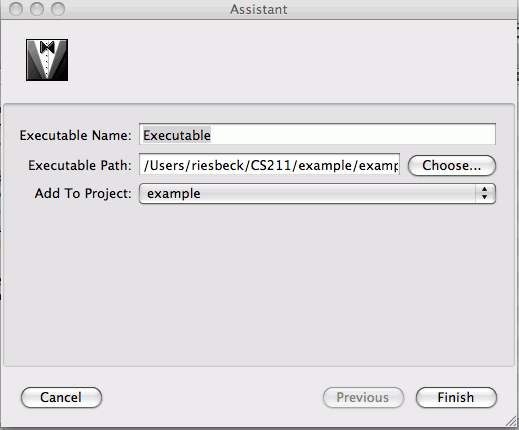
Select New Custom Executable... under the Project menu.
Click and use the mini-Finder
to find and select the example.exe file that the Makefile
created, then click .
A dialog appears to let you specify options for running this executable. Just close this box.
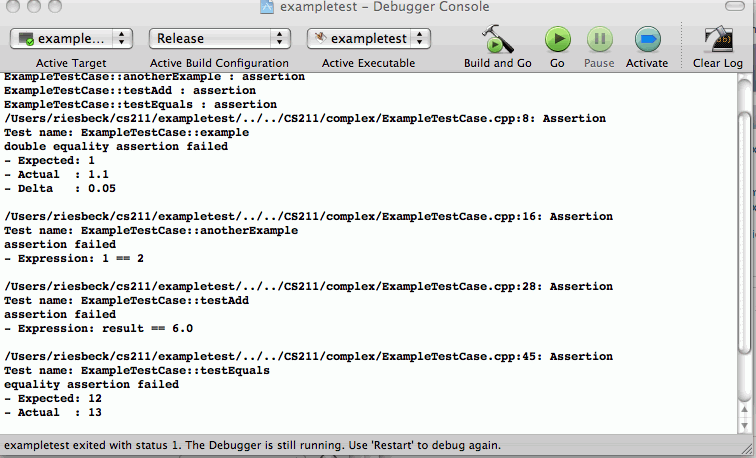
From now on, clicking the Build and Go icon will compile and run your project. Try it now. Assuming you've made no errors in your code, it should compile and run, and the output should appear in the console window. To see the output, select Console under the Run menu.
The console output should look like the output you saw when you ran the executable directly in a Terminal window.
Learn the shorcuts. This is a general tip for any development tool. After you've used your IDE a bit, learn to use the keyboard shortcuts for compiling and running and so on. This will speed up coding and testing a lot.
Don't rename code files in the Finder. This is a general tip for any development tool. Don't rename or delete files behind its back. The IDE can get very confused. Most IDEs provide their own commands for renaming and removing files, that rename or remove the file and also update the IDE's internal records.
Watch your head(er)! When you tell XCode to create a new C++ file, it automatically creates a header file too. That's fine because header files are good. But XCode opens the header file not the .cpp file. Many students accidentally put their C++ code into the header file, thinking they're putting it in the .cpp file.
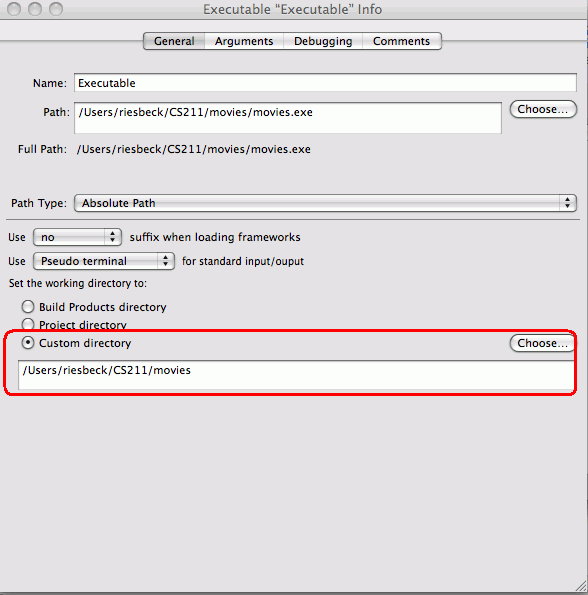 Why can't it find my file? If your program needs
to read a data file, you have to tell XCode where to look. Select
Project | Edit Active Executable to get the Executable Info
dialog box, and set the working directory
as shown to the directory that contains your data file(s).
Comments?  Let me know!